
In the previous article (From Zero to the Right Choice: Choosing the Right Flooring for our home), I wrote about how I went from knowing nothing about flooring to confidently choosing three-layer engineered wood. By the end of that process, the major decisions were already made:
- Flooring type: engineered wood
- Structure: three-layer construction
- Quality tier: thick wear layer and high-quality plywood core
What remained was the part where many renovations still go wrong: turning the right decision into a real, finished floor.
This article documents how that happened—step by step—through a combination of in-person work and small, well-timed help from AI along the way.
After the Decision: Moving from Thinking to Doing
Once the direction was clear, I stopped researching alternatives. At that point, learning more would not have helped—it would only have added noise. The goal shifted from figuring things out to executing cleanly.
That meant:
- visiting stores with clear criteria
- narrowing down brands before worrying about aesthetics
- choosing color and plank width in the actual space
- finding a local installer without losing quality and cost control
Step 1. First Store Visits: Turning Theory into Reality
The first store visits were where everything I had learned online finally met reality—and where many people get overwhelmed.
What I did is: Instead of browsing blindly in store, I briefly summarize my board criteria based on my discussion with AI so I could stay focused in-store.
I evaluated samples deliberately:
- how many layers the boards had
- how thick the top layer was and how the surface finish reflected light
- how substantial the boards felt in hand
- how the product smelled when a box was opened

Odor, in particular, turned out to be a surprisingly strong signal of quality differences.
After visiting multiple stores, clear patterns began to emerge. I quickly narrowed the field to just a few brands, including Mirage and Lauzon, that met all my criteria and then compared their costs.
Eventually, Mirage stood out—not because of a single “wow” moment, but because it kept passing the same checks over and over again, including low-VOC certificates, high-quality factory finish, adequate veneer thickness and stable engineered construction. With my criteria clearly defined and refined along the way, store visits became efficient and focused rather than exhausting.
Step 3. Choosing Color and Plank Width in the Real Space
During the store visits, I also formed my first impressions of the boards’ aesthetic qualities.
Within a single brand, color and plank width alone can create dozens of combinations. This is where it’s easy to overthink. To narrow the field, I took photos of my home and also captured images of several very different board colors. I then used AI to help identify which colors and plank widths were most compatible with my room style, quickly reducing the options to a short list.

In modern homes, wider plank flooring has become the dominant trend, with 7- to 9-inch planks now considered the standard for contemporary and high-end interiors. Wider planks create a cleaner, more cohesive look with fewer seams, making spaces feel larger, calmer, and more refined—especially in open floor plans and primary living areas. We created a virtual comparison to visualize the plank width difference and decided to go with 7’’ wide planks.

The final decision happened at home. I brought back the samples that seemed most promising and lived with them for several days, viewing them under different lighting conditions and next to existing furniture. Seeing the flooring in its real environment made the right choice obvious in a way that no showroom ever could. One note: do not ever ONLY rely on pictures on the websites!
Step 4. Finding a Local Installer and Keeping Control
With materials selected, the final execution step was installation.
I made a deliberate choice to separate responsibilities. I purchased the flooring and adhesive myself, while the installer handled installation only. This kept material quality under my control and made accountability clear—especially important to me, since I wanted to be confident that everything used was safe for our baby.
For the adhesive, we went with Bostik GreenForce®. It’s is a high-performance hardwood flooring adhesive that combines bonding, moisture vapor control, and sound reduction in a single product. More importantly, it is formulated with zero VOC content and it is child-friendly.
Before reaching out to installers, I used AI to get a rough estimate of the installation price range in my ZIP code and to summarize key discussion points to pay attention to during interviews. From there, the process was very traditional: contacting several local installers, comparing quotes, and listening carefully to how each person explained the work.
The installer I chose wasn’t the cheapest, but the communication was clear and the scope aligned exactly with the plan.
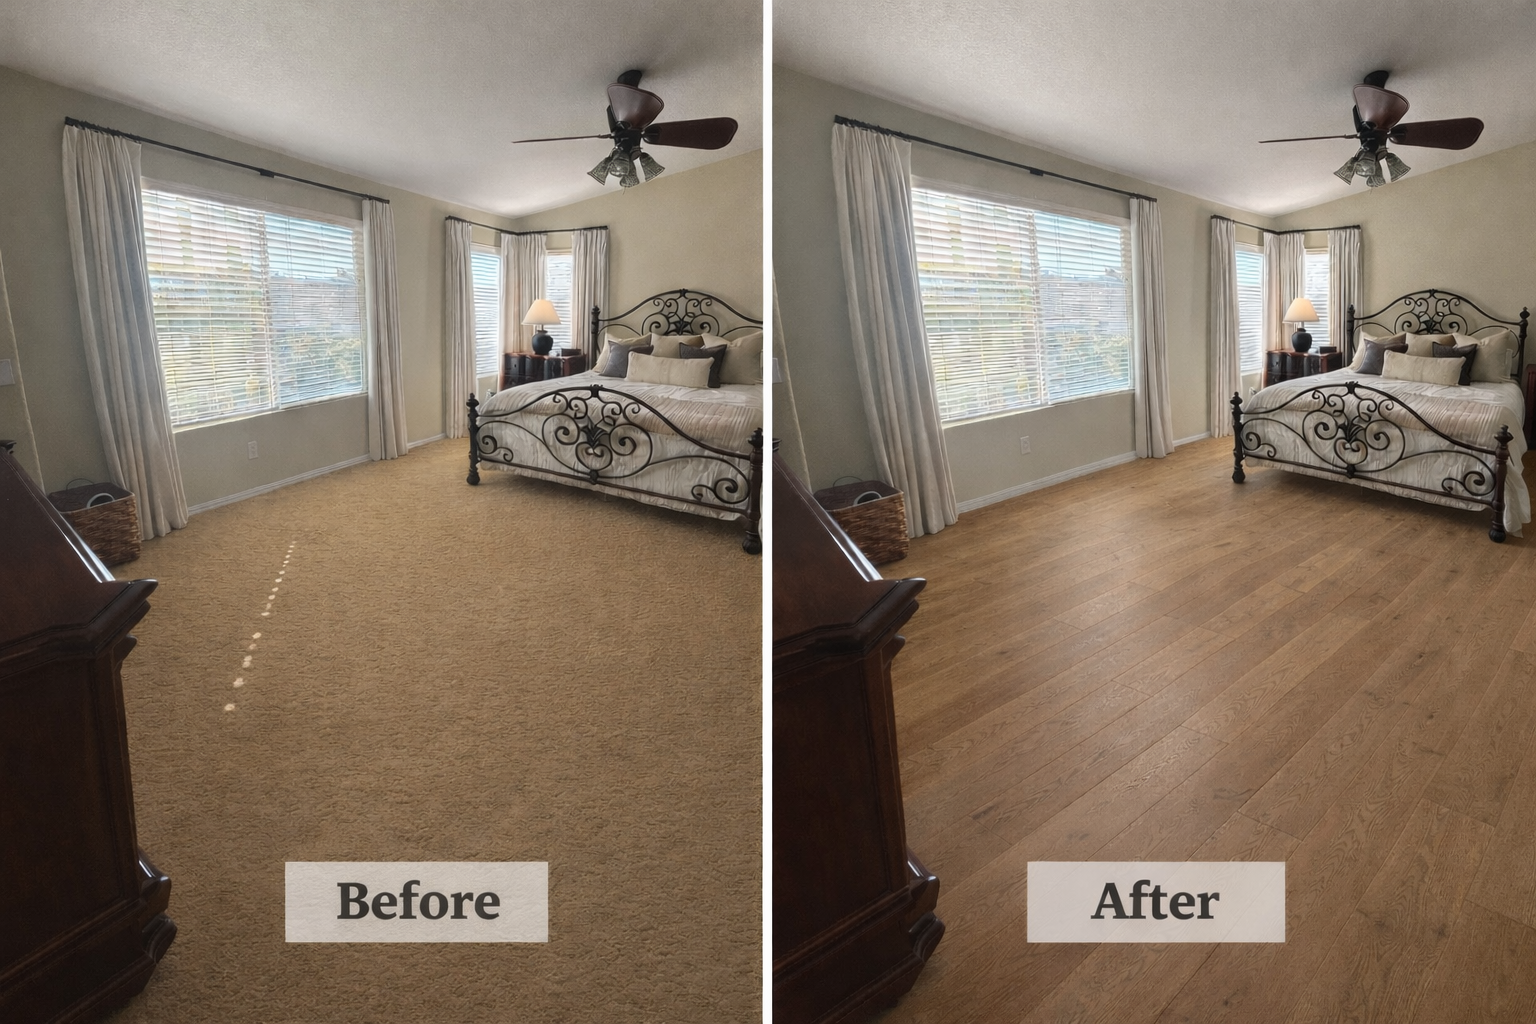
Installation: The Final Result
Installation itself was refreshingly uneventful.

The flooring was installed as planned, odor levels were within expectations, and the finished surface looked exactly like the samples I had selected at home. Because the materials, adhesive, and installer were all chosen intentionally, there were no surprises or last-minute compromises.
The final floor felt right in every sense—solid underfoot, visually balanced, and fully aligned with what I had envisioned from the start.
Looking Back: Why This Process Worked
Looking back, the success of this project didn’t come from a single tool or shortcut. It came from maintaining control at each stage and respecting the sequence of decisions.
Online research created clarity. In-person visits validated assumptions. Home testing confirmed aesthetics. Separating materials from labor kept execution predictable.
AI played a quiet supporting role throughout—helping organize thoughts, narrow choices, and confirm assumptions. By making it easier to work efficiently in an area I was completely unfamiliar with, it turned what could have been an overwhelming renovation into a manageable DIY project.
More importantly, this process isn’t really about flooring. It’s about learning how to make complex home decisions with confidence—one clear step at a time.


Leave a Reply